Copyright © 2007 - 2026, Coachworks For contact data Click Here.
Copyright © 2007 - 2026
Copyright © 2007 - 2026,
Coachworks For contact data
Click Here.
![]()
This engine was first installed in our workshop truck around 1998, and now, in 2021, we've given it a top-end rebuild. That work is described here.
NOTE: THIS PAGE IS UNDER-CONSTRUCTION! The images are genuine to this engine but the text may or may not be...

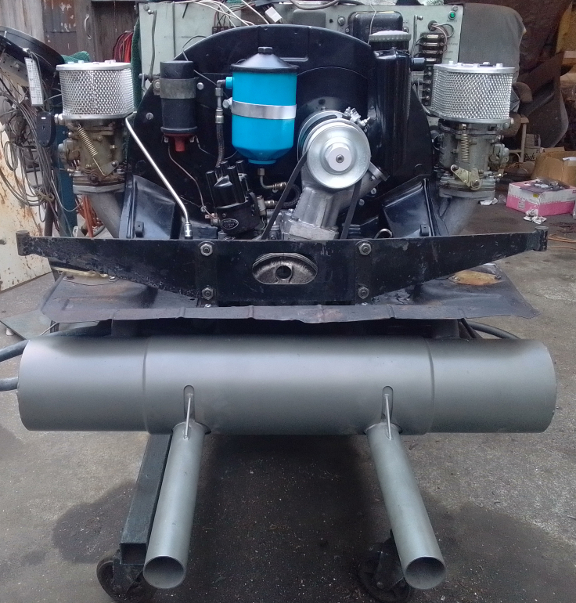
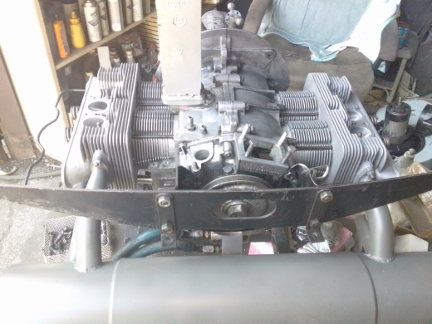
AT RIGHT: This engine, about to be run-in on our dynamometer AFTER all the work described here. ... At the time of the photo, some electricals were still required!
Oh, and yes, we did correct the tilt of the oil filter canister's band clamp before installation!
We rebuilt this 1968 (late '67 production) Porsche 912 engine, via a complete overhaul, back in 1993 and now, with nearly 30 years of hard service in a 1968 VW Double-Cab Type II, it has come back to us in 2021 for a top-end overhaul. This page tells its story.
This engine came to us from a friend of our founder who bought a Karmann Ghia to put this engine in to, but when his girlfriend (later wife) refused to ride in the Ghia, he'd already had our founder rebuild it for him, and so sold it to him on friendly terms. He then installed it in our workshop truck shortly thereafter. Unfortunately, back in the early '90s, we were still on film and we're not aware of any images taken of the build at that time.
In the mean time, the engine has been loaned from the 1968 VW Double Cab - nicknamed Babe, the Blue Ox - to another VW Type II, an Adventurewagon camper, on more than one occasion for cross-country trips, so this engine has had a LOT of heavy duty service!
Now, in 2021, we've serviced it with a full top-end rebuild, as documented here. ... Why only a top-end job? Well, it still has fantastic oil pressure! It runs Castrol GTX 20W50, and makes about 60 PSI cold, and normally runs around town at around 45 PSI. The car has a full-flow oil system with an external filter (that cannot bypass!), thermost and cooler, and on those occasions when it gets super hot - as hot as it gets is just a kiss over 210F - it still makes over 40 PSI. There's nothing to complain about that, so there's no reason to rebuild the bottom at this time.
Several ...
This engine has biral big-bores installed. Cast pistons are fine - they'll wear out about the time the cylinders do!
We always check the match pistons to cylinders and match piston weights as a set, and provide any remedial action to correct any errors before installation.
The next step was to measure the cylinder heights, sealing surface to sealing surface. Three were idential and the fourth was taller by about 0.04 mm. So, that cylinder top was lapped down to the same height as the rest.
For many shops, from this point, installation goes very quickly, but we think this is where one needs to take one's time! The key reason one needs to take time here is that there are production tolerances on every part in an engine, and while a set of parts may look identical, there's often subtle variation between members of a set, and there are sometimes significant errors in production that weren't caught by the manufacturer's quality control processes. These errors can "stack up" and cause problems if not discovered and corrected.
Here's our process: Two of these steps require special tools most shops don't have.
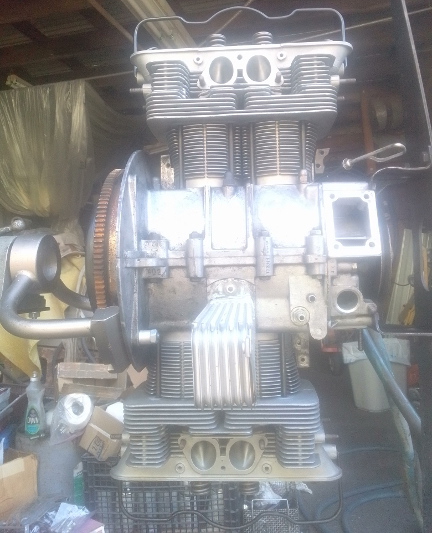
AT RIGHT: The cylinders were then trial-fit into their bores in the case and retained with special tools to measure the cylinder heights and ensure they match their neighbor.
ABOVE: How far the piston crown protrudes above the cylinder's top - a measure we call CAC for Crown Above Cylinder - is being performed on cylinder 3.
AT RIGHT: The CAC measurement for cylinder 1 is being made.
We like to carefully measure everything and then mix-and-match the parts for superior fit. We have also discovered significant manufacturing errors with this process which would likely have gone unnoticed without these measures. It is remarkably easy, for example, to overlook the circumstance of the crankshaft bore not in the true center of the crankcase, angled on the horizontal left or right of center, or not on the same horizontal plane at all. Yet examples of errors like these are not as uncommon as we would like.
The next thing we do is something nobody else does (that we know of) in the engine building process, and that is to measure the height the piston crown comes above the plane of the top of the cylinder. I call this the CAC, or "Crown Above Cylinder." This value is important because, firstly, it can reveal deeper problems, and because it helps us get the compression ratio equal in all four cylinders.
Here are some of the deeper problems that can be discovered through a CAC check:
In order to do this for these engines, you have to have special tools. Here, you can see them in action on this engine in the two images above.
The accuracy is so good, that if you take the time to swap parts around, you can accurately determine discrepancies in the manufacture of the various parts! But, we ARE splitting hairs here! However, a benefit to both engine builder and customer is that the ability to move parts around for better fit means that perfection is more easily achieved, and the more equal the HP production of each cylinder, the smoother the engine will run, and the more HP the engine will produce overall.
Because this process includes the entire assembly, torqued as in service, and measures the height each piston protrudes out of its cylinder, all errors in connecting rod lengths, cylinder heights, crankcase spigots depths (cylinder bore deck), piston connecting pin heights, and shim thickness' are accounted for in the measurement results. There is no superior method.
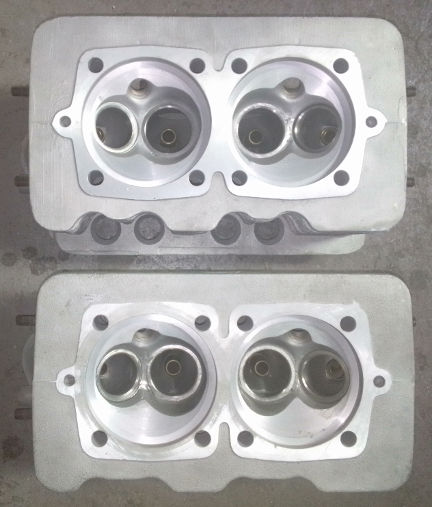
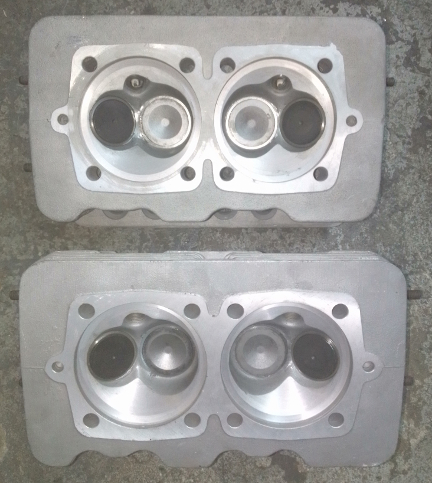
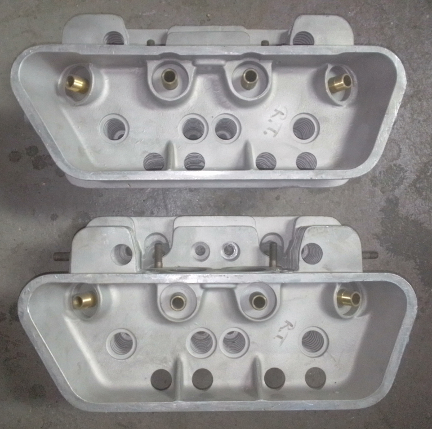
As described above, we chose to switch to genuine 356 C heads because they're the same shape as the early 912 except they don't have the damned oil oil for the breather. They've never been cracked and have no broken fins, and appear to be casting mates, probably from the same engine.

 At
this point the engine is ready for its cylinder heads, and this work went very
quickly - as it should! - as all the prep work was already done.
At
this point the engine is ready for its cylinder heads, and this work went very
quickly - as it should! - as all the prep work was already done.
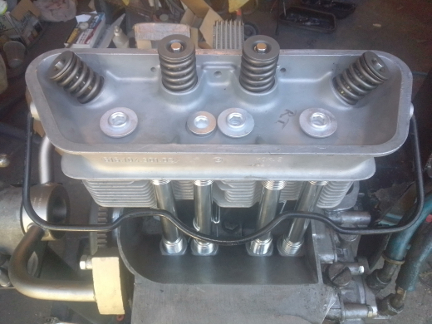
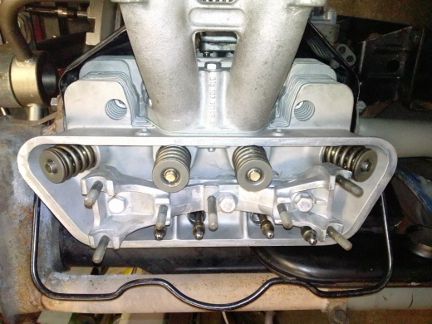
AT RIGHT: Here, the left head (3/4) is installed. Note the new valve springs, plated head bolts, and stainless steel pushrod tubes!
Prepare the head "bolts" and washers, prepare the pushrod tubes, prepare the lower cylinder air deflection plates and their wire retainers, and get the torque wrenches set, and bolt on those heads!
Our pattern is to mount one head, torque it to 7 ft lbs (as per the manual), then mount the other head the same way, and then alternate between the heads with an ever-increasing torque up to the final torque value, then repeat the final value until the fasteners no longer turn when torque is applied.
OK, mount the valve gear, adjust the valves and pop on the valve covers. Looks like I didn't take any photos of the valve gear.
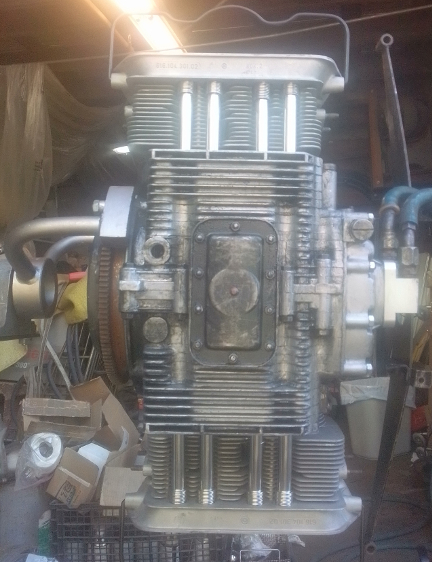
BELOW: Note that we left the full-flow oiling system components installed - in and out from the pump, easily reversible!
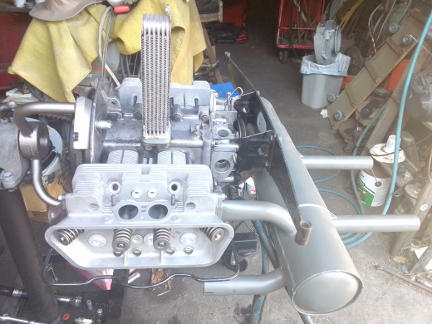
At this point, we tried to get a long-planned, long-awaited upgrade for easier cabin heat done via the use of a modified set of VW type II "high-performance" J-tubes (heat exchangers), but we got this far...
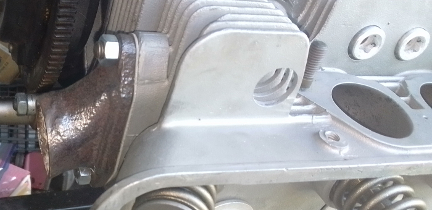
BELOW, LEFT & RIGHT: At left we're ready to weld on / modify as needed the VW J-tube (heat exchanger) to the fitting seen bolted to the cylinder 3 exhaust port at right. That fitting is the cast portion of the stock 912 item, by the way, right where a round tube welds on.
However, it didn't work out due to time as we promptly realized we'd need to skip the flapper boxes entirely and make some sort of splash shield to protect the engine from the thermal shock of the cylinders and head being splashed in a rain storm / puddle or whathaveyou. THIS IS NOT A TRAILER QUEEN! It's a draft animal, an ox, and it has to work in all weather! AND, we need it in service now, hot or cold!
So, while we thought we could perhaps have a mostly unmodified flapper protecting the engine and still run the heat exchanger, we realized the carburetor heat feature of the stock flappers was in the way and we had insufficient time to either modify them or devise a new solution, and so skipped it, returning to the manual-flap flip of yesteryear! Oh well! And so we had:
 And, shortly, just bolted everything back on...
...with more than a little haste, not stopping for photos much ... until we got to this:
Because some people are keeping logs of VIN and engine numbers and then purport to tell people what someone else has, out of respect and concern for a buyer's privacy, exact VIN and engine number data are not published here.