Copyright © 2007 - 2026, 356 Coachworks For contact data Click Here.
Copyright © 2007 - 2026
Copyright © 2007 - 2026, 356 Coachworks
For contact data Click Here.
![]()
This page is dedicated to Babe, the Blue Ox, my trusty Draft Animal.
In the summer of 2021, Babe got a lot of attention and along the way, the gas tank sprung a leak. This page tells the story of what happaned next.

 Babe
was ordered by one of the corporations that runs the huge warehouses in Long
Beach, CA that serve the port as the shop-foreman's indoor work-truck. And,
so it was immediately converted to run on propane.
Babe
was ordered by one of the corporations that runs the huge warehouses in Long
Beach, CA that serve the port as the shop-foreman's indoor work-truck. And,
so it was immediately converted to run on propane.
Unfortunately, Babe's second owner, who only owned it a couple of months, took out and threw away the propane system and installed a '71 dual port engine and a normal gasoline tank.
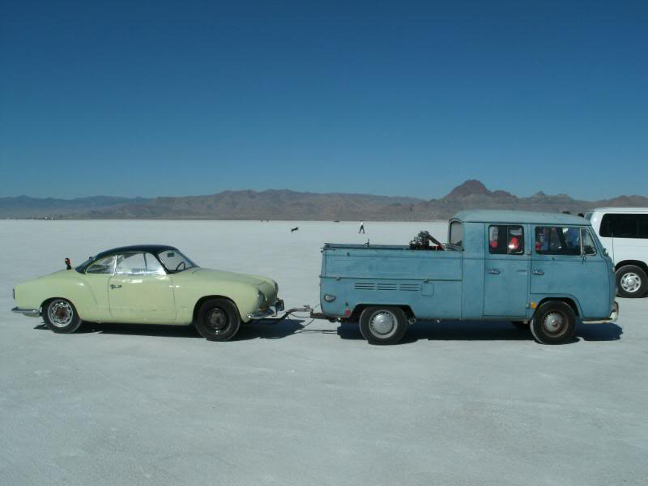
AT RIGHT: Babe should never have been asked to do the duty seen here on the Bonneville Salt Flats; the salt is a super-fine powder that gets in the air and therefrom permiates EVERYWHERE, and this is where Babe's corrosion problems come from.
The propane tanks were accessed via several access ports, including a hole in either wheel well, not far from the gas tank. This allowed easy access for the salt dust to get into and accumulate around the tank. And upon removing the leaking tank it was immediately realized that the tank had rotted from the outside in, not the other way around!
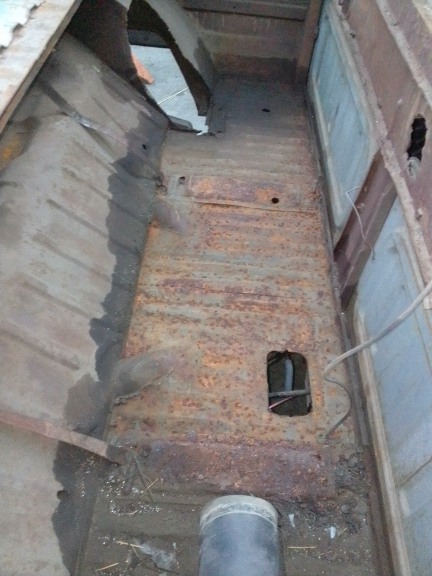
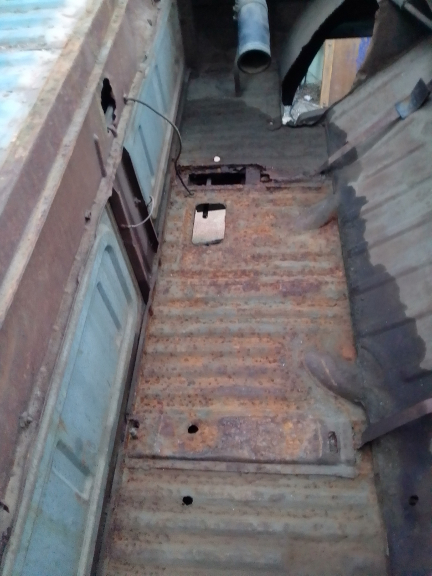
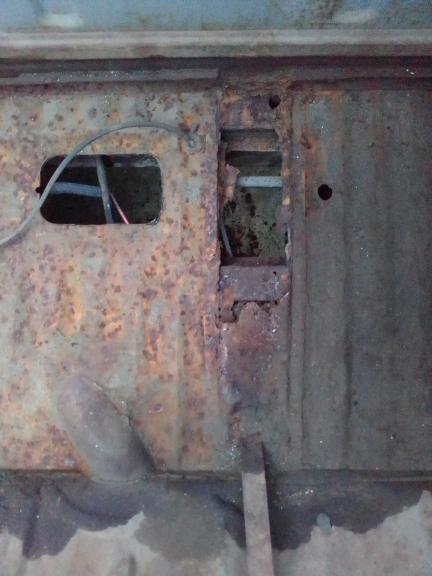
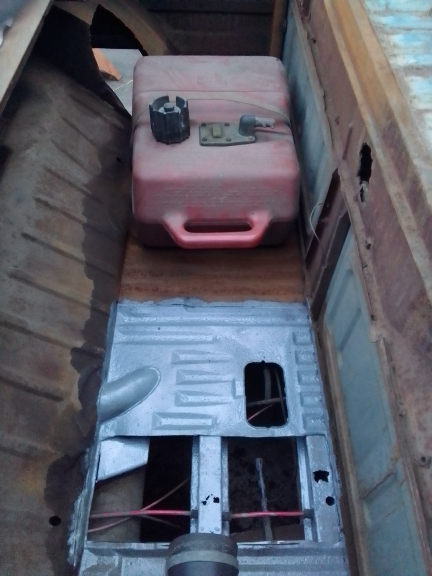
BELOW, LEFT & RIGHT: At left is what we found, after some vacuuming up debris, most of which came in through the gaping holes the first owner put in the wheel wells to accommodate the propane tanks. On the right, from the other side, but after we'd already been poking around as can be seen in other images below. The wetness visible is actually fuel residue that's soaked in to the 5+ decades of accumulated dirt -and this is at least two days after the tank itself had been removed already!
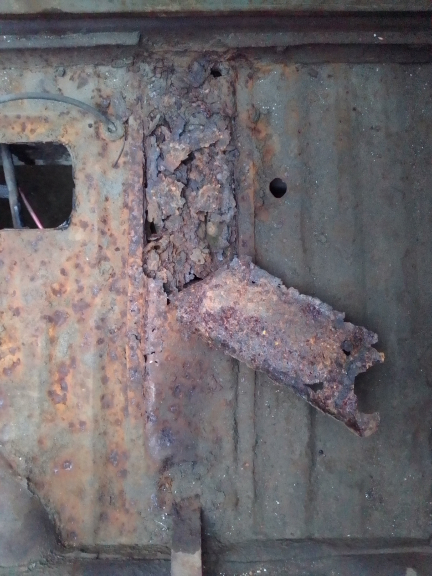
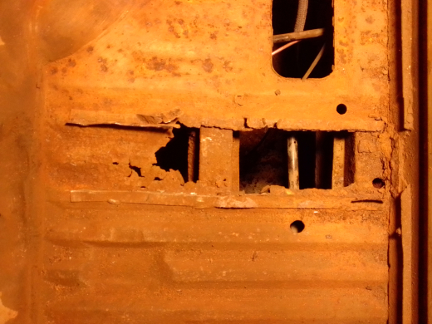
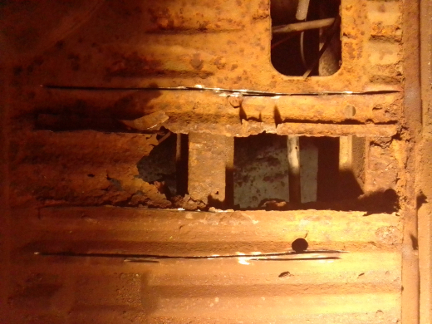
BELOW, LEFT & RIGHT: Here we can see the tank mount has rotted away and has trapped moisture (and probably not a little salt!) and thereby rotted out the flooring underneath. The tank mount has a welded in bolt or stud on one end and two slots for the strap on the other. There are two, of course, and this is the right one - the left one is, for the moment, solid. It didn't take much encouragement to get the flooring part to just fall through!
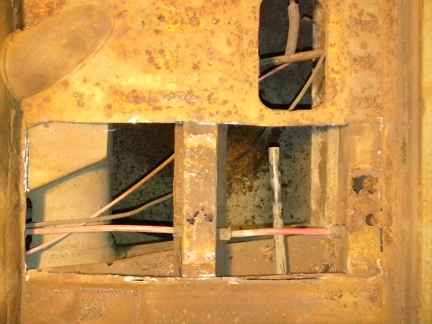
AT RIGHT: To install new metal, the rotted metal has to be cut away, so, here goes... Here we have torn away what can be torn away and then cut with a fiberglass disk the remnants of the tank mount, with the exception of two long strips that are here horizontal above and below the rot-hole. Why bother to grind or otherwise deal with that when the floor itself is going to be replaced?
AT RIGHT: The front of the car is to the right. To cut right up to the bulkhead, we used a sharp, very small chissel, and a fiberglass cutting disk for the rest - cut on the hight of the corrigation wave.
AT RIGHT: And now we're almost ready to weld. We'll wire brush the rot so we can get a good weld... We're also using POR-15 over the rusted areas NOW, before laying in the new floor.
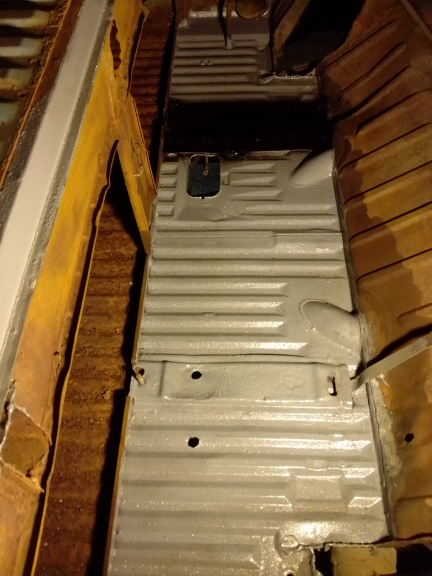
AT RIGHT: The whole floor was coated with POR-15 - a high-quality sealant whose name means Paint Over Rust, so it's designed for just this. Of course, the rusted areas had to be prepped first, which took, oh, 6 hours or more! Here, we've only gotten half way when the 4 ounce can we were using ran out. So, while waiting for it to cure, we contemplated a temporary solution for continuing to run errands!
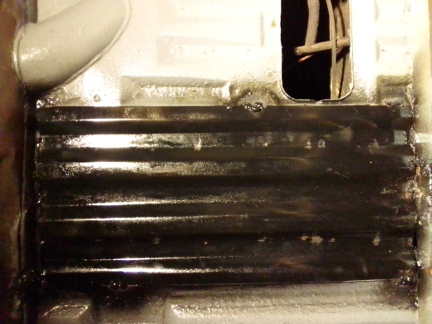
AT RIGHT: Here, the new floor is welded in and painted with rattle-can black. ...It'll get more coatings later. Note the corrigations.

AT RIGHT: Here, the new tank mount is now installed over the repaired floor. The sharp-eyed can see the bolt / stud welded in at the right side (right is the front of the vehicle, left is the rear).
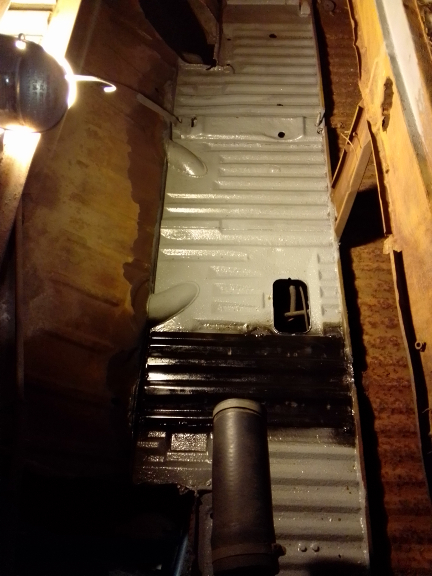
BELOW, LEFT & RIGHT: Here we see the work nearly completed, image taken from the left on the left, right on the right.
Read Our Terms & Conditions, and our Terms Of Service.